How to Choose a Low Pressure Injection Molding Machine

Choosing a low pressure injection molding machine is not simply a matter of comparing price and tonnage. In practical production, the wrong machine can damage delicate components, create flash, or waste valuable material. A suitable machine should match the resin, mold design, insert size, production volume, and required surface quality. Small details matter.

In my experience, many buyers focus on maximum pressure and overlook control stability. That shortcut can become expensive. Review the machine’s pressure range, injection speed, temperature accuracy, clamping force, and shot capacity. Check how gently it handles fragile inserts and thin-wall parts. Ask the supplier to run trials with your actual resin and mold. Watch the filling pattern, cycle repeatability, part finish, and demolding process. Request maintenance records, operator guidance, warranty terms, and references from comparable applications. Reliable technical support often matters more than an impressive brochure.

No machine fits every factory. A compact model may save floor space but struggle with future demand. A larger model may offer capacity while consuming unnecessary energy. This trade-off deserves honest attention. I have seen promising samples fail during long production runs because cooling, cleaning, or operator training was underestimated. That mistake is easy to repeat. Compare total ownership costs, not only the purchase price. Include electricity, tooling changes, spare parts, downtime, and service response. Leave room for uncertainty. The best low pressure injection molding machine is the one that delivers stable, repeatable results under real working conditions, not merely during a short demonstration.
How to Choose a Low Pressure Injection Molding Machine

Define Low Pressure Injection Molding and Its Main Applications

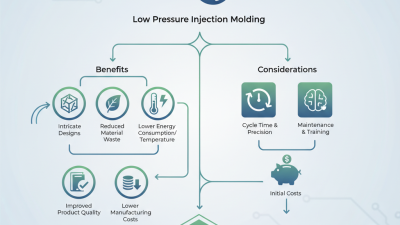
Low-pressure injection molding uses relatively gentle pressure to push a heated, often polyamide-based material into a mold. The material cools around components, forming a protective layer or housing. Unlike conventional injection molding, the process can reduce stress on delicate parts. Less force. That matters when a circuit board has small solder joints, fine wires, or fragile sensors.

Common applications include encapsulating electronic modules, connectors, cable junctions, and wire harnesses. A molded seal can help shield components from dust, vibration, and moisture, depending on the material and part design. For example, a compact sensor may sit in a custom mold while warm material flows around its edges. The goal is protection without crushing the electronics or blocking essential contacts.

This process is useful, but it is not a universal fix. Material choice, mold layout, temperature, and fill behavior all affect the result. A poorly placed gate can leave an unfilled pocket near a connector. That can be frustrating. When evaluating a machine, check whether it controls pressure and temperature consistently, and whether its tooling suits the part’s geometry. Test samples matter; a machine’s stated capability alone cannot confirm that a specific assembly will be protected.

Identify the Materials and Products the Machine Must Process

Choosing a low pressure injection molding machine starts with the material, not the machine’s headline capacity. List each resin or hot-melt compound, then check its processing temperature, viscosity, and moisture sensitivity. These details affect flow through narrow channels and around fragile components. A material that looks suitable on paper may fill unevenly when a connector has thin walls or deep recesses.

Next, define the products the machine must process. Note their dimensions, cavity layout, inserts, and heat-sensitive parts. Electronics housings, cable connections, and small sensor assemblies may need gentle filling to avoid stress or damage. Consider how quickly parts must cool and whether operators will load them by hand. Small details matter. A pin placed slightly off-center can change how material flows around it.

Use supplier data sheets as a starting point, then confirm the choice with controlled trials using representative parts. Record melt temperature, injection pressure, fill time, and visible defects. Compare results across the actual materials and product shapes, not just a test block. A tidy spreadsheet can still miss a difficult corner or an air pocket. That is worth checking twice. If material batches vary, leave room for adjustment rather than choosing equipment around one perfect trial.

How to Choose a Low Pressure Injection Molding Machine — Identify the Materials and Products the Machine Must Process

Material Family Typical Processing Characteristics Common Products and Applications Machine and Tooling Requirements to Check Selection Questions
Polyamide hot-melt compounds Commonly used as low-pressure molding compounds; available in grades with different flexibility, adhesion, and temperature resistance. Processing temperature is grade-dependent. Wire harnesses, electrical connectors, sensor assemblies, and small electronic components. Confirm the required melt-temperature range, material residence time, shot capacity, nozzle design, and compatibility with the intended substrate and mold. Does the compound adhere to the wires or components? Does the product need flexibility, strain relief, or resistance to heat and moisture?
Polyolefin hot-melt compounds Often selected for electrical encapsulation where low moisture absorption or chemical resistance is useful. Formulations and flow behavior vary. Sealed cable joints, connectors, cable exits, and protective covers for electrical assemblies. Check the compound’s processing window, required flow into narrow spaces, shot size, and whether the machine can maintain stable temperature control. Does the application require moisture protection or chemical resistance? Is adhesion to each insert material adequate?
Other formulated hot-melt molding compounds Specialized formulations may be selected for particular adhesion, flexibility, or service-temperature requirements. Processing conditions must be taken from the material supplier’s technical data sheet. Custom encapsulation of switches, coils, terminals, and electronic subassemblies. Verify material compatibility with the heated system, seals, hoses, and nozzle. Confirm that the machine supports the compound’s specified processing conditions. Are the material’s temperature limits, cure or cooling behavior, and compatibility with the product fully documented?
Fine-wire or delicate electronic assemblies Product construction, rather than material alone, can determine the required injection pressure and flow path. Delicate components may be affected by heat, pressure, or flow. Sensor leads, compact connectors, small circuit assemblies, and components with fragile wires. Assess controllable injection pressure, repeatable dosing, nozzle access, mold venting, and the ability to position inserts consistently. Can the material fill around the assembly without shifting wires, damaging components, or leaving voids?
Large or multi-branch assemblies Long flow paths and multiple encapsulation zones can increase the required shot volume and make filling balance more important. Branched wire harnesses, multi-connector assemblies, and larger cable transitions. Size the shot capacity for the complete molded volume, including expected process allowance. Check mold layout, gate position, flow distance, and cycle requirements. Can the machine fill the entire part consistently, and can the mold hold all inserts in the required positions?
Products requiring outdoor or harsh-environment protection Material selection should be based on the actual service environment, including temperature, moisture, chemicals, vibration, and UV exposure where relevant. Outdoor sensors, vehicle electrical connections, industrial cables, and equipment connectors. Confirm that the machine can process the selected grade and produce repeatable encapsulation. Validate the finished part with application-specific testing. Which environmental conditions and service-life requirements must the molded product meet?

Selection note: Processing temperatures, viscosity, and other settings vary by formulation and grade. Use the material supplier’s current technical data sheet and confirm machine capacity with representative material, inserts, and mold trials.

Compare Machine Pressure, Capacity, Speed, and Control Features

How to Choose a Low Pressure Injection Molding Machine

Compare pressure ratings using the same measurement: material pressure at the screw or nozzle, not hydraulic-system pressure. A mismatch can make two machines look similar on paper but behave differently with the same resin. Check shot capacity against the part and runner weight; a tiny shot near a machine’s maximum capacity can be harder to control. Leave practical headroom. Numbers need context.

Cycle speed matters, but compare the full cycle, including filling, cooling, and mold opening—not just the injection stroke. Watch a trial run: does the machine fill a thin rib evenly without flashing at the parting line? For control, look for repeatable pressure limits, stable temperature settings, and clear alarms. The U.S. Department of Energy’s Energy Tips: Injection Molding guidance reports that variable-speed drives can reduce machine energy use by roughly 20–50%, depending on operating conditions. Treat that as a potential range, not a promise. A small caveat: the fastest setting may increase scrap or make delicate inserts shift. Compare actual pressure, usable shot size, cycle time, and energy use with your intended mold and material.

How to Choose a Low Pressure Injection Molding Machine

Compare pressure, capacity, speed, and control features against your part and material requirements. The chart shows illustrative target shot capacities for quote comparisons; these are planning examples, not market averages or manufacturer specifications.

How to use the chart: Choose a shot capacity that covers the material needed for the part and runner, while avoiding an unnecessarily oversized machine. For each candidate, also verify maximum injection pressure for the material and mold, injection-speed range for reliable filling, and controls for repeatable temperature, pressure, and injection profiles. Confirm all specifications with the machine supplier.

Evaluate Mold Compatibility, Automation, Safety, and Maintenance Needs

Choosing a low pressure injection molding machine starts with the mold, not the brochure. Check mold dimensions, shut height, clamping needs, and the material’s flow behavior. Confirm the machine can deliver a stable shot without excess pressure or heat. Fit matters. A small trial with the actual mold can reveal leaks, uneven filling, or awkward loading before installation.

Automation should match the work area and the operator’s routine. Consider material feeding, part removal, cycle controls, and whether sensors can detect a missed step. A simple setup may be more dependable than adding automation that is difficult to adjust. Safety features matter just as much: inspect guards, emergency stops, and access around hot surfaces and moving components. Keep hands clear.

Maintenance needs are easy to underestimate. Look for accessible filters, hoses, seals, and electrical connections, then ask how routine checks are documented. Operators should be able to notice a small leak or changing cycle time before it becomes a larger interruption. A tidy specification sheet can still miss real shop-floor problems; that is worth remembering. Confirm service access and spare-part availability before choosing.

Select the Machine Based on Cost, Space, Energy Use, and Supplier Support

A low-pressure injection molding machine should fit the job, not just the budget. Compare the purchase price with installation, training, tooling changes, and routine maintenance. A cheaper machine may cost more if it needs frequent adjustments or slows changeovers. Ask for a written estimate based on your expected parts and operating hours. Small details matter.

Measure the available floor space before comparing machine dimensions. Include room for the operator, material loading, mold changes, and access to electrical connections. A compact machine can still be awkward if its doors or service panels cannot open fully. Check the required power supply, too. Energy use depends on the machine, cycle settings, and production schedule, so request consumption data under conditions close to your own. Ask for evidence.

Supplier support is part of the machine’s real cost. Confirm response times, spare-parts availability, operator training, and access to technical guidance after installation. If possible, review a sample cycle or run your own material and mold. That can reveal setup issues a brochure will not show. No estimate is perfect; actual energy use and maintenance needs may differ once production settles into its normal rhythm.